

Gretchen's madder repro star.
The background might be classified as either a coral print or a stick print.

A shawl print imitating woven design.
I could go on about quirky print fads in the early-19th-century but this has got to stop somewhere! Here's the LAST star post in the Time Warp Quilt Along. We'll end with three related designs typical
of early 19th century roller prints from about 1810-1840.
Shawl Prints

The design influence of India's cashmere shawls was impressive. From them we get the classic paisley prints, which were first called shawl prints.

European printers borrowed the boteh shape. They also imitated
the expensive woven shawl look by stylizing shapes to look
like they are woven. Notice the diagonal lines and the jagged edges.

A twill shawl print designed to look like it is woven
rather than printed.
Shawl prints did not necessarily have the botah shape we
associate with paisley prints.

From a quilt about 1810. The jagged edges could be quite strange.

A small florette (#1) a shawl print from Ackermann's Repository about 1810.

Note the tiny printed lines
to further the illusion. The lines echo a twill weave.

Another issue of Ackermann's Repository with a form of shawl print style at top.

Shawl print (lower left) and a mossy trail or coral (upper right)
Stick Prints & Cracked Ice
The fashionable jagged look is also seen in two relatives: Stick prints and cracked ice, also probably derived from Eastern imports to Europe.

Odd relations about 1830: stick prints and cracked ice.
Stick print for the light at the top here

Cracked ice for the light at the lower right.

Stick prints might be seen as moss or seaweed but
are exaggerated in their angularity.
They resemble a Japanese porcelain pattern called Prunus or Hawthorn.

A plum tree design

The blue stripe is a stick print that would never grow in nature.

A shawl print with a stick print.

Stylized paisley with green sticks.
Too buggy for me!
Cracked Ice or Thorn Prints

In the 1960s textile historian Peter Floud mentioned “cracked ice” as a style often seen in quilts from the second quarter of the 19th century. The spiky vines or thorns seem to be a cross between seaweed and stick prints.


Thorns or cracked ice.

Cracked ice as a fancy machine ground

The lower pink and white print---cracked ice?
Mimimalism in the 1830s.

The source for cracked ice as with the stick flowers may very
well be the European fascination with Asian porcelain. Above a Japanese
vase from about 1710 described by dealer Polly Latham as:
"A classic Kangxi period blue and white yen-yen vase decorated in the 'Cracked Ice and Prunus' pattern."
Read more about cracked ice here:
Reproductions

A stripe from French General
You may have some reproductions that imitate woven pattern,
forms of the shawl print

Stick prints and cracked ice are going to be harder to find.

From Terry Thompson's Louisa line a few years ago.

From Moda's Mill Book 1852.
Cracked ice?

SF's star center fits right in here.
These last categories are going to be in short supply in your stash or your shop.
But now you have new shopping goals.
What to Do With Your Stack of Stars?
Use Them for Sashing
Use Them for Sashing

Sandy Klop and her Oh! My Stars quilt.
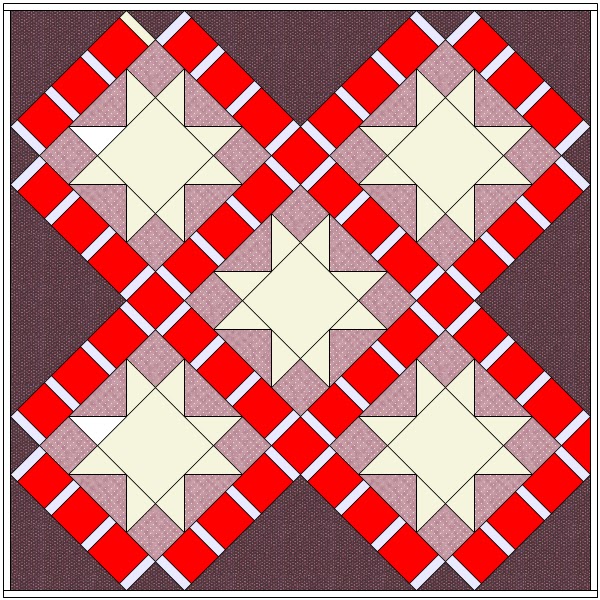
Here's an ambitious plan.
You could set all your six-inch stars into sashing for a larger star.

Above: An antique quilt
(All I can find out is that it's attributed to Camden County, New Jersey.)
Below: Sandy's pattern for American Jane

94" x 94"
This amazing pattern has won quilters
some prizes since Sandy published it a few years ago.
Scroll down to the middle to see the pattern.

Here's Patricia Dear with her Best in Show.

A little Photoshopping
You could take 117 of your 6" stars and turn
them into the same sashing for a 24" star. You might want to choose
a simple star for that large star.

My EQ7 sketch shows you how to piece the sash.
Each red square is a 6 finished star. Cut the light colored
sash rectangles 2" x 6-1/2"
You'll be making strips that finish to 24" x 6."
Use a 6" star for the cornerstones between sashing.


This sketch is a little out of scale but each red square is
a 6" star. I drew it up in EQ7 and it tells me the finished
quilt will be about 127" square.
Sandy used a smaller setting star since her finished quilt
with its dog tooth border is 94" square
Maybe you have more use for a quilt that's about 84" square.
But this one only uses 52 of your 6" stars.
You could set everything on the square grid.

Nine big stars finishing to 24"
and 88 small stars finishing to 6".
It's ONLY 90"

You could also reduce the size by omitting the little sashing strip on the original.
Piece three 6" stars together into 18" finished sashing strips.

Your large star would then be 18".
Each of those small squares is a 6" star.
I think you are still using 117.

98" x 98"
Another option: set 2 stars in strips that sash finished 12" stars.
One Last Thing About Early Roller Print Styles

Nine patch from about 1890
Notice the lilac cracked ice in the center strip at left and right.
Designers have been reproducing old looks for a long time.
The 1870-1910 era is full of repro styles in new shades.
Next Week: More Sets
21 comments:
Thank you, thank you, thank you, for all your wonderfully illustrated teachings on the Stars! I have just finished making my alternate hourglass blocks for my stars so it is time for my layout and assembling. This quilt would never have happened without you!
Barbara, thank you for a wonderful series - you are so generous with your knowledge and wit. My first top is done and I'm still making stars for a second. Thank you for helping me become a more informed and appreciative consumer and quilter!
Thank you so much for a wonderful year of "Stars". I enjoyed every minute of making these little babies. You have spread your love for fabric history even further this year with so many quilters jumping into this fun project. I have many friends who are making them that had no idea about quilt or fabric history at the beginning, who are now eager to now further their education. You are a treasure Barbara and I thank you!
Thank you so much, Barbara, for generously sharing all this wonderful information. I've looked forward each Wednesday morning to turning on my computer and checking out the week's lesson and have had great fun digging through (and enhancing!) my stash. I'm working on a layout for my stars and I look forward to seeing what everyone does with theirs. I love antique quilts and fabrics and thanks to you I now know and understand more about them. Thanks again!
Thank you for taking us on this fascinating fabric journey and sharing your vast knowledge so generously. Kind regards, Penny.
I thank you also, Barbara - I've learned so much this year! And it's given me the opportunity to visit some of the deep dark recesses of my stash :)
I have at least two quilts in mind for my stars. Thanks again!
Hate to see the Stars in a Time Warp end!! It has been so enjoyable as well as most informative!! Thank you for all the research you do for us to read and learn in one place!
I haven't been making stars. My reproduction stash is small. But my knowledge of reproduction prints is growing and my appreciation for the art of knowing about reproduction fabrics is quite large at this point! At my bee this month, two of us had been independently following your Stars in a Time Warp series, and we realized that we had your blog in common and shared it with our bee friends. You inspired me to buy a robe print for the background of my one and only reproduction project, and I knew more about it than the LQS assistant! Thank you sincerely for your time, effort, and sharing your expertise!
Barbara,
Thank you for Stars in a Time Warp. This is the first time I've done a quilt-a-long and it's been both fun and educational. Patt
Barb, thank you so much for your weekly lessons. I have looked forward to them every week. We all have learned so much - I know I will never look at fabric styles and colors the same again!! I have decided on a blue fabric from your Metropolitan Fair line to set my blocks with. It only seemed appropriate to use one of your fabrics! Thanks again for a great quilt along.
Is anyone going to be making more stars into 2016? I have loved this Time Warp Quilt Along even though I joined very late, at the end of April. Then, in mid August I had to go overseas on family business, and have just returned as the series is ending! While I was away I read up on the new topic each week and was just dying to get back to sewing. I will just keep adding my stars to the Flickr page (hope I can do that).
I have learnt so much about textile history and reproduction fabric. Thank you so much for your generosity Barbara. I have so enjoyed this.
Will anyone else be making stars to catch up? I hope so.
Dear Barbara,
I'm French and I participated to this wonderful stars adventure !
I learnt a lot, discovered a lot and sometimes I was angry because I didn't have THE great piece of fabric.... But now, I have a beautiful quilt !!
Thank you so much for your wonderful work.
Thank you Barbara for a very informative year of lessons.
As others have stated, each Wednesday I looked forward to learning something new about textile history.
I have loved civil war era fabrics for many years and continue to collect them. It's nice to go to a quilt shop or show and be able to recognize the print style.
Thanks again!
You must work SEW hard to get all this together for us.Thank you so much!
I'm sad to see the end of this wonderful sew along. I rarely do them, but this was such fun and informative!
Thanks Barbara!
I'm looking forward to setting my little stars.
Barbara - Thank you for the wonderful lessons each week. Though I have not been able to find some prints or colors to match the weekly lesson, I am so much smarter about what I actually have in my stash and hope to expand on the variety of prints over time. Seeing the tester blocks and what others had and how they used their prints was so inspiring.
This has been such an enjoyable project and incredibly productive. Never in my wildest dreams could I have made over 100 stars without your help. :-) Now to start the assembly process. Just like the Civil War quilts, I expect to be WOWed by what others will do. Now that recent layout you shared using our stars as sashing around feathered stars is amazing and tempting - it's jaw dropping beautiful. I might have to sit back a few weeks to get more ideas from you and the rest of the star making gang.
Happy Thanksgiving to you and your family.
There it's finished ! a bit sad ! We will proceed to assemble the quilt now!
My little Mom looked forward Wednesday to sew the stars! I want to say a big thank you to Barbara. I watched my fabrics carefully they are best stored.
I bought plastic boxes for them and they really took the air !!!! Over all new fabrics bought my hiding place is beautiful! But I know there are still missing a few, not many ice cracked here !!! Thanks for everything I learned! I also sew my Grand mother's choice!
I am always Embruns and Petits Points( blog)
You can see my two red quilts in our exhibition this summer.
Thank you, thank you, thank you and see you soon on Flickr!
xoxoxo
Evelyne
Thank you so much for your blogs and books! I have learned so much about quilting and fabrics. I really enjoyed the "stars" posts.
I need some help. I am a beginner-level quilter. I machine-piece the tops and send out to a longarm service for quilting. I saved your posts from 2014 "Threads of Memory" and am going to make that quilt in 2016 (I'm ready now). I would like to find a collection of 5 reproduction fabrics already matched to make a pretty quilt. I only need one yard of each. I am not that good at selecting the fabrics yet. I usually try to emulate the picture I am working from. Can you give me some suggestions of reasonably priced, pre-selected fabrics (including your own)? Thank you.
Over a year and a half after you completed this series of posts... thank you for writing and posting them! I am just beginning to become interested in the reproduction look, and reading through these posts has helped me shop my stash and find what I have that will work... and what I need to be on the lookout for. So, thank you very much, Barbara!
Thanks for posting Kristin. Glad to help you build a stash!
Post a Comment