Becky's top half in progress
with the checkerboard filler blocks.
Yankee Diary #8
A Wartime Wedding
Lyn's using traditional colors from
Hope's Journey by Betsy Chutchian.
"A pretty strong colour palette," says Lyn.
You might want to choose your fabrics now and cut the squares to save for the final set. Or you can start setting the blocks now. We still have four blocks to go.
Denniele's Checkerboard Filler
Denniele's whole quilt in progress.
This will finish to "42" x 54".
She posts pictures on her Facebook page LouannaMary Quilt Design.
A wedding in camp,
1863 from Harper's Weekly
From Carrie's Diary. March 26, 1862.
"I have been up at Laura Chapin's from ten o'clock in the morning until ten at night, finishing Jennie Howell's bed quilt, as she is to be married very soon. Almost all of the girls were there. We finished it at 8 p.m. and when we took it off the frames we gave three cheers.
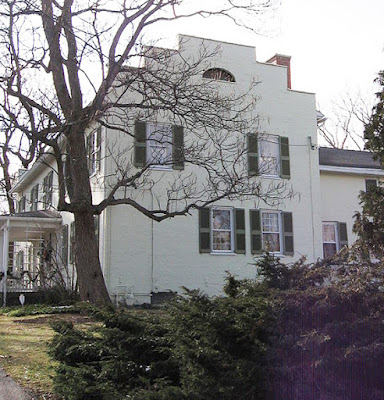
The Thaddeus Chapin House where they finished Jennie's quilt in 1862.
"Some of the youth of the village came up to inspect our handiwork and see us home. Before we went Julia Phelps sang and played on the guitar and Captain Barry also sang and we all sang together, 'O! Columbia, the gem of the ocean, three cheers for the red, white and blue.' "
Jennie's house and her father's law office in Canandaigua
Four quilts survive that were made by the women in Carrie's
society, although the one meant for Jennie Howell Hazard is not accounted for.
A collage of items in the Ontario Repository and Messenger
in April, 1862
Jane E. Howell, Carrie's close friend Jennie, married
John R. Hazard of Buffalo in a red, white and blue ceremony. The newspaper reviewed the "Patriotic
Wedding" with a pun on the groom's name.
"Love is victorious in the North...The sacred old national colors floated in their ancient beauty. Snowy-purity was the central attractions with crimson splendor on one side and azure glory on the other...The most charming fact of all was: How well the beautiful bride accepted the Hazard."
CDV photo of a wedding in the 1860s
Jennie Howell Hazard (1840-1891)
from Nancy T. Hayden's book
The Complete Guide to Village Life in America
The Checkerboard
Filler
Inspiration for the filler strips: A sprightly nine-block sampler sold at Cowan's Auctions several years ago. The center block is dated 1862.
And this flag quilt made during the War now in the collection
of the Belfast Historical Society, Maine.
This set finishes to 42" x 54"
Checkerboard Filler of 3" finished squares
Cut 3-1/2" squares in darks and lights. I count 39 squares--- 19 light, 20 dark or vice versa.
(But then I am not good at counting---get distracted.)
Filler for the top center area:
You'll need a strip of 3 for left of the word. Along the top a strip of four to fill out the 15”.
Might need another square or two. Depends on how long your "Liberty" strip is.
Block 12 will go under the word.
Filler for the bottom right side:
Make two strips of 5:
one single and one double.
One set of three and a double set of four.
Filler for the bottom left side:
One set of three and another double set of four.
Also a plain strip cut 3-1/2" x 12-1/2" that goes below the flag on the left.
William Pope Anderson and bride,
CDV from a Cowan's auction.
Weddings are always a romantic notion, but Jennie's marriage to John Hazard seems to have been unhappy. After two daughters, she was back in Canandaigua for the 1880 census, living with her parents where she died in 1891. John Hazard and her daughters resided in Buffalo.
A Checkerboard Border
You could keep making checkerboards for a border.
With a checkerboard border finishing to 6" wide, 54" x 66”
Cut 136 squares in all. (68 light/68 dark)
.
Above a digital sketch that gives you the idea. Measurements for the all the blocks are divisible by three so 3” finished squares will work.
For the side borders: Make strips 2 squares wide by 18 squares long (finishing to 6” x 54”).
Cut 72 squares 3-1/2”.
For the top and bottom borders: Make strips 2 squares wide by 16 squares long (finishing to 6” x 54”)
Cut 64 squares 3-1/2”.


3 comments:
An easy one! I'm going to hold off on this step so I can see what other fabrics I use in the remaining blocks and make my checkerboards correspondingly scrappy. I like the checkerboard border ...
Becky, yours is stunning. Love seeing each month unfold. And I will never look at fillers the same way again after seeing that 9 patch with the huge checkerboards. Certainly makes a statement! Thanks, Barbara!
I love the checkerboards. It is good to see how all the blocks will come together, that will help me in choosing fabrics. I think I have waaaay more fabric than I need, but what else is new.
Post a Comment